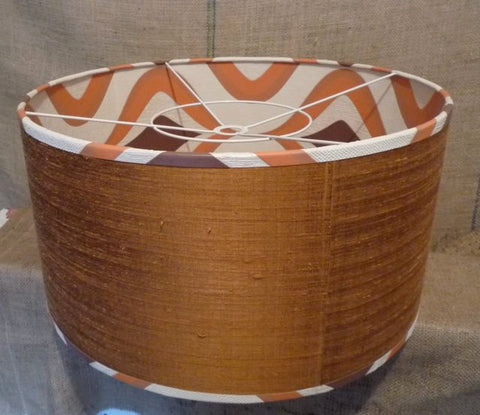
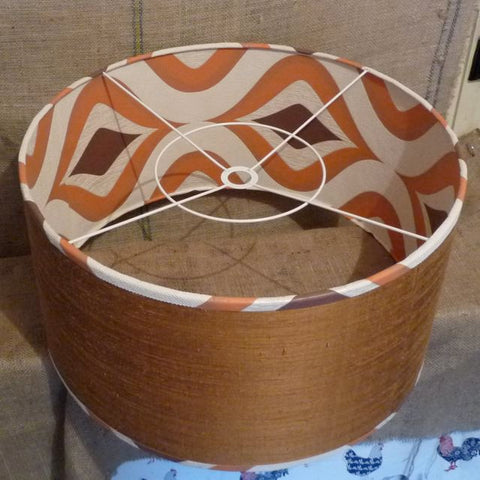
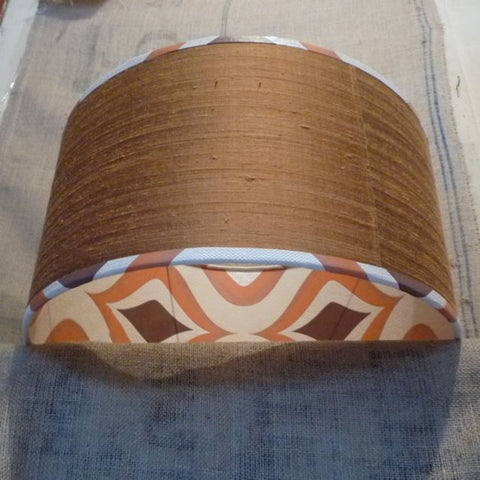
I often talk about lining lampshades with wallpaper in my workshops and I think its time for a bit of tutorial on here so you can have a try of this very simple idea yourself!

Really this is SUPER easy and has such an AWESOME effect, I really recommend that you give it go.
Okay, let's get to it.

Lining a lampshade with wallpaper
Follow the usual steps for making a lampshade as per these instructions:
Now before you get to the pegging it all together part (Step 7), add in the following steps.
STEP 7a:
Cut your wallpaper panel to the same size as your lampshade paper panel. Lay your lampshade paper panel white side up on a clean flat surface, then lay your wallpaper panel right side up on top of that.
STEP 7b:
Line up the edges of your panels carefully, no gluing is required here. You are going to use the rings to hold the wallpaper panel in place.
Now come back to Step 7 in these instructions and peg it all together as your normally would. Now when you get to Step 8 which is rolling your edges and gluing them into the rings, take EXTRA CARE to remove any gluey mess in between each section. Do NOT wait until the end to try and remove the glue. You really need to glue a section - 10cm to 20cm at a time - then gently rub your thumb or finger along the wallpaper lining to ball up any glue and remove it.
TOP TIP 1:
Ultimately, you are trying not to leave a lot of glue behind in the first place. You do this by being very patience...once you apply the glue to the top of the ring and the outside edge of the fabric, WAIT a full 20 seconds or so to let the glue go tacky, then continue. By WAITING this 20 seconds, this allows the glue to lose that very wet feeling and reduces its smooshability (yes, I made that word up ;-)
Check out this video for best tips on rolling your lampshade edges.
TOP TIP 2:
Don't be tempted to add glue or try to stick your wallpaper to the lampshade paper panel. I tried this and failed, dismally! These photos are the 3rd attempt I made at this shade! If you glue it down the wallpaper buckles when you create the curve around the rings. By not gluing, you allow the wallpaper to move into a perfect position so that no buckling will occur - trust me! I made that mistake TWICE and the most simple, no glue solution is seriously easy and by far the BEST result.
I hear you asking...is it really that simple?
Well, YES it is! Have a go yourself - you won't be disappointed! And if you have any questions along the way, please feel free to contact me, I'll do my best to answer your questions in a timely manner ;-)

Further Notes:
Now a couple more notes here. In these pictures you can see that I've also added a top and bottom border of more wallpaper which looks so super cool (in my opinion!).
So what I actually did was I rolled the edges of my fabric first. Then I cut a 3cm strip of wallpaper by 164cm in length (which is the circumference of the shade plus a little overlap). Then I glued the strip to the outside of the shade with a 1.5cm overhang. From there I found that the wallpaper wasn't stretchy like a fabric is and pretty much impossible to roll. So in order to roll the wallpaper edges what I needed to do what cut in (with scissors) a whole lot of little nicks in the wallpaper every few centimetres to enable me to roll it over the rings and stick it into the inside edge of the rings inside.
So in the end I rolled the edges of this lampshade two times, once with the fabric, then another with the wallpaper edged border - a time consuming process but doesn't it look gorgeous!
And really, that's what handmade is all about don't you think ?
Your Turn
If you have a go at this method, I've LOVE to hear your feedback. Please use #3chooks so I can see it on your socials ;-)
Happy lampshade making!
PS: I'll make a video with this process too soon, watch this space ;-)
